Showing posts with label tutorial. Show all posts

Tuesday, November 30, 2010

Tips for improv landscspe your photos

1. Maximize Depth of Field (DoF)

 
An approach to the normal concept of a landscape photography is "sharply from toe to the end of the horizon". The basic concept of the theory of "oldies" We agreed that an appropriate landscape as much as possible all parts of the photo is the focus (sharp). To get the sharpness wide or with other words the field of depth of focus (DOF) is as wide, can use apperture (aperture diaphragm) is as small as possible (large f number), for example F14, F16, f18, F22, f32, etc. So, with increasingly smaller apperture, means the length of exposure.
Because of the limitations of the lens (which is not able to reach f32 and / or f64) or spot position where we stand do not support, a different approach can be used, namely the theory of hyper-focal areas of focus to get the "optimal" in accordance with our scene face. The core of the hyper-focal distance is to put the focus point in the right position to get the focus area which the widest possible so it will be sharply distinguished from the FG to BG.


For example:
With a wide DoF, due to the use and application of hyper-f/20 focal distance to determine focus


Still with the hyper-focal pengaplikasikan to obtain a distinguished DOF widest


2. use tripod dan cable release


As a result of increasingly wide DOF resulting in increasing length of exposure, a tripod for long exposure required to ensure that the resulting image sharp because it will reduce the vibration when taking pictures. Here we also can use a cable release and will function image stabilizer (Canon) or VR (Nikon) will be helpful to produce a better picture.


3. look for Focal point or titik focus

The point of focus here is not the point where the focus of the camera is placed, but rather a point where the eye will first fixed (eye-contact) when viewing photos. A photo without a focal point, will make the eyes "wandering" without time to stop, which resulted in loss of interest in a landscape photo. Such images are often called flat (Bland). Focal points can be a form of buildings (which, uniquely among small or empty plains), trees (which stand alone), stone (or a set of stone), the person or animal, or the silhouette shape kontrast with BG, etc.  Laying in which the focal point is also sometimes very influential, here the rules of "oldies" Rule of the Third play

the example below, the focal point is a person who dressed in red umbrella


Focal point is the sun and reflections on the field:

4. Look for Foreground (FG)
Foreground could be a focal point becomes even POI (Point of Interest) in your landscape photo. Therefore look for a strong FG. An object or pattern in the FG can create a "sense of scale" of our landscapes.


examples of application of FG on stone
Another example...


samples with FG on grass:


5.Select the sky or land

The sky is cloudy vibrant, especially during sunset or sunrise, will make us interesting photographs, but we still have to choose whether we will make our pictures composed mostly of the sky with putting a little below the horizon, or most of the mainland with putting a little weight on the horizon. How good was the land and sky that we meet / encounter when photographing, dividing two equal parts between the dramatic sky and the land / FG would make an interesting photograph of a landscape becomes the focus, krn both parts equally good. Composition by using the principle of "oldies" Rule of the Third would be very helpful. Put the horizon line, in 1 / 3 the top if we wished to emphasize (emphasize) its FG, or place the horizon in the third the bottom, if we want to highlight the sky. Of course the law "Rule of Third" may be violated, if the violation actually strengthens the focal point and not vice versa. It is also not always dead center is ugly

For example under the mainland is more dominant than the sky

sky dominates:

Violation of Rule of Third is the same split second between heaven and earth


6.Carilah Garis/Lines/Pattern

A line or pattern can make / become a focal which will lead the eye to further explore your landscape photo. Sometimes leading lines or patterns could even be a POI from the photo. The lines, also can provide a sense of scale or the image depth (depth of field). Lines or patterns can be anything, a row of trees, shadow, line the street, stairs, etc.


7. Capture moment & movement

            A photo Landcsape does not mean we only catch (capture) the heavens, the earth or the mountain, but all the elements of nature, be it still or moving, such as waterfalls, streams, trees moving, the movement of clouds, etc., can make a landscape photo interesting.


8. Golden Hours & Blue hours

In the normal color landscape photography, the best time usually is a time around (before) sunset or after sunrise. Golden hours are the time, usually 1-2 hours before sunset (sunset) until 30 minutes before sunset, and 1-3 hours after sunrise, where the "golden light" or the sunlight will make the golden color of the object.

For example:


Blue is a few hours time, usually up to 20-30 minutes after sunset (sunset), where the sun had set, but the sky was not dark black. At this time the sky will be blue. So is not quite right, that at the time the sun had set and the sky was getting dark (by our eyes), we directly pack gear / tripod us. Precisely at this moment we can get a nice scene where the sky will be blue and not black. Usually with long exposure, cloud (though if we see with the naked eye sdh not shown) will still be seen clearly and give texture to the blue sky.

For example:


If we take photos during the golden hour has passed, or when the sun was blazing, usually the result will be flat or harsh lighting because the sun was already well above. This contrasts with the IR landscape photography who do not know the golden hours, where the best time just when the heat of the sun

9. Cek Horizon

Although these errors now easily can be corrected with image editor, but I still believe "get it right the first time" will be optimized. There are 2 things the last time before we press the shutter:
·         Is horizonya already straight, there are several ways to get straight horion time of execution on the field, see # 11
·         Is already on the horizon komposisikan well, see # 5 for the application of Rule of third.
Regulation / rule is sometimes made to dilangar, but if the scene that we will create is not strong enough (strong) elementnya, usually Rule of the Third will help create a better composition. Indeed with croping later in image processing software, we can fix it. But if not forced, it's better when we have put executions on the horizon which should position.

Examples of the photo below is one of the dr picture I took the safe side (save) to position the horizon at the time of execution. Therefore I put the horizon right in the middle course, the hope at that moment, I can do cropping later on (either dicrop the top or bottom).

example of a straight horizon:


10.Change viewpoint/angle

Sometimes we are glued to the perspective or angle that we generally do, or maybe when we visit a place that we often see a picture either dimajalah or the FN website like this, we become "talkative" and taking pictures with the same angle. Many ways to get a fresh point of view. Not always "eye-level angle" (the normal position when we are standing) in a photograph that best. Try with high-angle (the camera raised above the head), waist-level angle, low-level, etc., try different horizontal format and / or vertical. Or trying to find a spot or a different stand point or a different place, for example from the top of the tree (there is a senior photographer I know who likes to climb trees to get a different view, and the results are different and unique), or try to stand more ketepi abyss , or even lying on the ground, of course, with more priority to your own safety as a major factor and calculate the risks that may be obtained. One thing that must be understood, tried with different viewpoints do not always automatically the image we will be better or better, but so once you get a better view, is guaranteed to be different from the others. With her frequent experiments with different angles, over time you will instinctively trained while in the field to get not only a good angle, but also different. Do not take pictures over and over again at one point / spot. Try to shift a few feet laterally or forward, or even walk long distances. Also occasionally try to turn round to see, sometimes can get interesting and different angle. 3-5 exposures / shots at one point and "move on, change spot, change orientation (landscape <-> portrait), look back, change lenses". Especially if you frequently travel, be it to a place that is public or to a place rarely visited photographers. There are times when we are in a spot where the pictures from that location was the site of a "million people" where hundreds or even thousands of photographers have photographed in the same spot and produce images that are similar or disparate thin. Use photographs that often you see it as a reference, study and apply the technique and try to find something different. Make a difference. If do not mind sleeping on the asphalt for a moment.

11.use the tool

The use of some auxiliary equipment below will be helpful to get a better landscape photos.
- CPL filter

- ND filter

- Graduated ND filter
- Graduated color filter
-Bubble level if no existing grid in view finder or use a focusing screen with grid, very helpful to achieve the level horizon

12. lensa yang digunakan

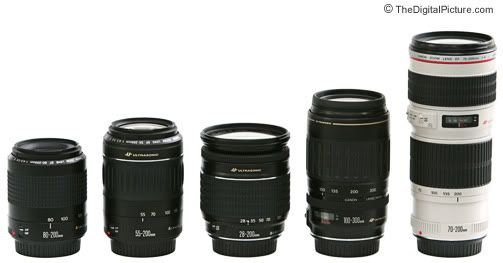
Sometimes there is the assumption that a photograph of a landscape that must use the lenses as wide as possible. But in making a photograph of a landscape, all lenses can be used, from super wide lenses (14mm, 16mm, etc.), wide (20mm - 35m), medium (50mm - 85mm), up to a telephoto / super telephoto (100mm - 600mm). All range and lens can be used.  It all depends on the needs and the scene that we face. Lens wide / super wide sometimes needed if we want to summarize a broad scene with objects that include a lot or a remote or want to get a unique perspective. But sometimes a tele can be used to isolate the scene so that more un-cluttered, simple and focus. If arriving at a location / spot, try try with all lenses that you bring. Do not be fixated on one lens and photographed repeatedly.
Sometimes it takes foresight, to see and find a unique shape or pattern of the extent of a landscape scene, so that we can either isolation by using the right lens. Only by frequent shooting and face a variety of scenes in a variety of conditions that can hone your instincts, be it an object what to look for or what lens should be used. The use of standard lenses that do not like fish-eye (be it a diagonal or a full-circular) could also get an interesting view, certainly with the use at the right time. Not always use fish-eye image to produce "good" although it is different.

Examples of landscape photos with 200mm lens

Examples of landscape photos with 300mm lens

The use of fish-eye lens


source:
kaskus.us
By: indoagam

http://fotografer.net
By: Yadi Yasin

Saturday, November 27, 2010

basic techniques in photography

1. Depth of Field (DOF)

Depth of field or often shortened to DOF is one of the most basic fotgrafi technique. Every photo has a depth (depth), consisting of foreground (front) and background (back). Focus on the camera lens can be controlled or directed at specific objects. Depth of Field Control allows you to restrict the focus on photos and more to give the impression of life on the photo.
The following example shows a short DOF with focus on the foreground:

The following example shows a short DOF with focus on the background:

The following example shows images long DOF / in, with a focus on the foreground and background.


Here's an example comparison of the images on the lens focal length and aperture are different:
 

2. Freeze

After understanding the DOF associated with the aperture, this time will be explained about the freeze, which are intimately associated with the shutter speed. Photos freeze aims to capture a moment with a quick movement that can be caught by the camera as still images, such as photos of water droplets, explosion, or a photo when people were jumping and so forth. The most important in getting photos freeze is set shutter speed as fast as possible (eg 1 / 500 sec, 1 / 1000 second, up to 1 / 8000 sec). Because of the demands of a fast shutter speed, then of course it takes a lot of light, and therefore usually freeze amateur photos more done in open space during the day where the sun shines bright. It is not possible to obtain photograph freezes at night or in low light, but absolutely necessary ancillary equipment such as flash or studio lights with high-speed asynchronous as well.

example for freeze:


example again:


3. Movement

Contrary to the picture freezes, picture movement aims to show the movement of objects with a low shutter speed, so that movement of object can be seen in the photo. Shutter speed is used tend to be low for the movement of objects can be recorded (eg 1 / 5 seconds, 1 second, etc.), but noteworthy is the camera must remain in static positions for background than objects remain focused despite slow shutter speed.

Here's an example photo movement:
example again:


4. Panning

Similar to the method of image movement, but in a more object motion panning images displayed through a moving background. The basic principle of photo together with a photo panning movement, only at the time of the shooting, the camera follow an object moving compensate for movement, so the object remains the focus but the background that produced moving.
Sample image panning:

How to photograph panning:
Shoot a moving target (usually a car), press the shutter button half for focus lock object, the camera movement to follow the object as tightly as possible in order to stay focused object, if felt to compensate for camera movement is movement of an object, press the shutter button fully with a fixed camera moves to follow object.


5. Bulb

Photos bulb can be obtained through the manual mode to adjust the shutter speed on the slowest setting (bulb), which will hold the shutter open as long as the button is pressed and will close again when the button is released. Which should be noted on the photo camera bulb is the position that absolutely must be static, then use a tripod to produce photo bulb.
Sample photo bulb in city traffic at night:

example again:

Source : Kaskus.us
ID: bebek_loncat

the basics of SLR camera

SLR Camera
 SLR (Single Lens Reflex) or D-SLR (Digital) is a camera with a viewfinder (viewfinder) which provides images in accordance with the angle of view lens via a mirror reflection that lies behind the lens. In general, regular cameras have a viewfinder display of a different viewpoint because the viewfinder lens is not aligned with the angle of view lens.

As discussed earlier, fotgrafi closely related to the light, the camera serves to regulate the light that was captured image sensor (image sensor on digital cameras or film on a conventional camera.) To set the light, there are 2 basic points of the camera, the Shutter Speed (Shutter Speed) and aperture (diaphragm).


Shutter speed

speed camera window is open so that light can enter the image sensor. Unit than the shutter speed is second, and very much depending on light conditions while shooting. Such bright light during the day, then shutter speed should be adjusted to be faster, such as 1 / 500 sec. As for a light evening a little more, then shutter speed should be adjusted to be longer, such as 1 / 5 seconds. This also explains why the photo at night tend to be blurry, that a slower shutter speed allows the camera movement due to vibration shifted hands make light so that images become blurred / blur.

Photos with fast shutter speed

Photos with slow shutter speed

Aperture

Aperture is the term for the lens aperture. If likened to a window, then the diaphragm is kiray / curtain that can be opened or closed to adjust the amount of light entering. On the camera aperture is denoted by the letter F and the unit as follows:
f/1.2
f/1.4
f/1.8
f/2.0
f/2.8
f/3.5
f/4.0
dst...

The smaller the number of units then the greater the aperture lens (f/1.4 larger opening than the f/4.0).

Pic: Aperture on the lens

So, the correlation between shutter speed and aperture is that the larger the aperture, the shutter speed will be faster, otherwise the smaller the lens aperture, the shutter speed will get slower.

Mode on a DSLR camera
Each camera has a term, respectively - each for setting fashion. Here are described for several types of cameras only.

D70 mode image
On the Nikon D70 camera has 11 shooting modes:

M= Full Manual
In this mode the camera is fully manual settings, good shutter speed, aperture, ISO, etc..

A= Aperture Priority
In this mode the aperture can be adjusted in accordance with the will, but the shutter speed will automatically compensate the light requirement in accordance with the large aperture.

S= Shutter Priority
Pada mode ini shutter speed dapat diatur sesuai dengan kehendak, namun aperture akan mengimbangi secara otomatis kebutuhan cahaya yang sesuai dengan shutter speed.

P= Program
In this mode both aperture and shutter speed will be calculated automatically according to the needs of light, only in this mode the level of exposure can be adjusted according to the will.

Auto
Auto mode is a mode where the camera is fully set up will all the needs of the setting, in other words in this fashion photographer stayed "snap" course.

Portrait
This mode is a bifurcation full auto mode, but more tailored to the needs of portrait (human photos), such as the use of tonal colors for skin tone, etc..

Landscape
This mode is a bifurcation full auto mode, but more tailored to the needs of landscape photos (landscape), such as tone colors more vivid, or so forth.

Macro
This mode is a bifurcation full auto mode, but more tailored to the needs of image macros (short distance, so objects appear larger), such as a more customized focus lens.

Moving Object
This mode is a bifurcation full auto mode, but more tailored to the needs of shooting a moving object, so the focus lens will more quickly move to adjust to the movement of objects.

Night Landscape
Mode ini merupakan pencabangan mode full auto, namun lebih disesuaikan dengan kebutuhan pemotretan objek yang bergerak, sehingga fokus lensa akan lebih cepat bergerak menyesuaikan dengan pergerakan objek.

Night Portrait
This mode is a bifurcation full auto mode, but more tailored to the needs of the day or night portrait photos in low light.

Picture mode Canon 350D

On the Canon 350D camera there are 12 shooting modes:

A-DEP= Automatic Depth of Field
In this mode, focus foreground and background settings adjusted automatically by the camera so it is more likely to produce good sharp images in the foreground or background.

M= Full Manual
In this mode, fully manual camera settings, both shutter speed, aperture, ISO, etc..

Av= Aperture Value Priority
In this mode the aperture can be adjusted in accordance with the will, but the shutter speed will automatically compensate the light requirement in accordance with the large aperture.

Tv= Time Value Priority
Pada mode ini shutter speed dapat diatur sesuai dengan kehendak, namun aperture akan mengimbangi secara otomatis kebutuhan cahaya yang sesuai dengan shutter speed.

P= Program
In this mode the shutter speed can be adjusted in accordance with the will, but the aperture will automatically compensate the light requirement in accordance with the shutter speed.

Auto
Auto mode is a mode where the camera is fully set up will all the needs of the setting, in other words in this fashion photographer stayed "snap" course.

Portrait
This mode is a bifurcation full auto mode, but more tailored to the needs of portrait (human photos), such as the use of tonal colors for skin tone, etc..

Landscape
This mode is a bifurcation full auto mode, but more tailored to the needs of landscape photos (landscape), such as tone colors more vivid, or so forth.

Macro
This mode is a bifurcation full auto mode, but more tailored to the needs of landscape photos (landscape), such as tone colors more vivid, or so forth.

Moving Object
This mode is a bifurcation full auto mode, but more tailored to the needs of shooting a moving object, so the focus lens will more quickly move to adjust to the movement of objects.

Night Scene
This mode is a bifurcation full auto mode, but more tailored to the needs of photo at night.

No Flash
This mode is a bifurcation full auto mode, but if the other auto mode built in flash will automatically pop up when light is less, in this mode built in flash will not light at all, so the shutter speed and aperture will further contribute to offset the need for light .


Light settings

Each camera has a light meter that functions to detect light intensity. Before pressing the shutter button, when using the camera in manual mode the exposure meter is worth considering first.
Next image exposure indicators:

Shown in the picture above the bar that indicates exposure. If you want to produce images with excellent light, put a bar in the middle position (normal exposure), but if it produces a brighter picture, slide the bar to the sign + (become over-exposure), and vice versa, for the results of a darker picture slide bar direction - (to be under exposure)

sumber:

http://www.kaskus.us
ID : bebek_loncat

type of LENS and uses function


type of lens and its uses function
The lens is the first filter media when we scan an image to be stored. Therefore a basic knowledge of digital camera lens is very necessary. The camera lens is didiesain use computers to improve accuracy. To increase the sharpness of the lens, the lens is coated with certain chemicals.
Views differences of opinion between the lens:


Here are some common types of lenses used on digital SLR cameras:

A.  Prime lenses (fixed)
primes have enlarged the picture and perspective that can not be changed .. for example: 14mm lens f / 2.8 and 50mm lens f / 1.4
example primes lense


B. Zoom Lenses (vario)
A zoom lens is a combination of all three types of standard lens, wide angle lens, and telephoto lenses. The size of the lens is not a fixed size, but rather a certain range of the lens, eg 80-200 mm. This type of lens is the lens of the most widely used because it has a character that is flexible and wide range of lenses is enough. Thus, if you want to use a certain size lens users stay rotate the lens size as needed.
example:
lens 18-70mm f / 3.5 to 3.4
lens 18-135mm f / 3.5 to 5.6
lens 70-200mm f / 2.8
whereas vario lens is divided into 3 according to the lens focal length, namely:1. wide angle lens (wide lens)
Wide angle lens is a lens that is used to capture large objects in the viewfinder field is limited. The character of this lens is to make objects smaller than actual size. The size of this lens is varied, including: 17 mm, 24 mm, 28 mm and 35 mm. Besides, there are also wide-angle lens with a diameter of 14 mm, 15 mm and 16 mm. The lens is called a fish eye lens lens.
Caption this lens:
lens has a focal length of 28mm is not limited to,
(+) Takes a broader perspective, sharply wider space
(-) Barrel distortion is quite high, making it less suitable for shooting a model, because the result in part of the body such as the larger models .. (If you want to photograph models which do not use it later visible fat)
Image to the right nokon 18mm-55mm

2. Lenses Normal / standard
Standard lens is a lens that becomes a standard component of the camera. The size is 50 mm. The character of this lens is to provide natural shots. These lenses are suitable for medium-range shooting.
Caption this lens:
has a 35-70mm focal length, has a point of view + - the same as the human point of view (+ - 45 degrees)
(+) No distortion
(-) Normal (not special)
This lens is suitable for documentation / photo

Nikon 35-70mm f/3.5


3. Tele Lens
Telephoto lens is the opposite of wide angle lens. Telephoto lens to zoom function, but the narrow viewing angle. Which includes a telephoto lens is a lens with a size of 70 mm and above. Another function of telephoto lenses is to make croping and focus on a particular object and blur the objects in the vicinity.
Caption this lens: This lens has a focal length between 80mm-infinite is the opposite of this lens wide lens
(+) Close to distant objects
(-) Space is more narrow sharp, distortion pinchusion
This lens is suitable for shooting models, sports, concerts, paparazzi
Figure wide range telephoto lens:


C. Macro Lens
Macro lenses are usually used to target small objects. In this digital camera, macro-scale enlargement done digitally and not be done optically. All types of lenses have the same characteristics, namely the smaller the size of the lens, the more wide-angle that can be reached by the camera.
Example macro lens and photograph


D. Lens PC (Perspective Correction)
Having the ability to correct perspective, commonly used for architectural photography

E. Fish eye lens
This lens has a 180 degree angle of view and usually lenghtnya 16mm focal length. This lens produces effects such as fish eye view (convex)


Similarly, information on various types of lenses and their role may be useful ....
:)

 
Design by Free WordPress Themes | Bloggerized by Lasantha - Premium Blogger Themes | Macys Printable Coupons